Product Design

Product Design

Product Design

Tractus Smart Site
UI & UX Case Study

Tractus Smart Site
UI & UX Case Study

  1. About

About Tractus Smart Site

Tractus Smart Site represents an innovative Augmented Reality application designed to facilitate comprehensive on-site inspections. Users can navigate their surroundings, utilizing advanced scanning capabilities to detect and assess the condition of objects.

The app empowers users to identify faults, breakages, or defects with precision. During the augmented reality session, users can seamlessly take notes, ensuring thorough documentation of their observations. Additionally, the platform provides a structured checklist of tasks, guiding users through a systematic and efficient inspection process.

Challenges and Objectives

The goal of the project is to design and build a user friendly application for technologically unversed users to scan hardware objects using Augmented Reality and solve any detected defects

My Role and Responsibilities

User Research and User Flow

Wireframing and App Structuring

Iterative Mockup Design & Prototyping

Mockup Design & Prototyping

Developing in Unity 3D

  1. User Research

The User Research process for Tractus Smart Site was conducted with a blend of internal team surveys, brainstorming sessions, and competitor analysis. Our internal team surveys provided valuable insights into the diverse perspectives within the organization, capturing firsthand knowledge of user expectations and preferences. Engaging in brainstorming sessions allowed for collaborative idea generation, fostering creativity and ensuring a comprehensive exploration of potential features and functionalities. Concurrently, a thorough competitor analysis was conducted to glean insights from similar solutions in the market, identifying both best practices and areas for innovation. User Personas, Application Structure and User Flows were also created during the process.

a. User Persona

b. User Needs & Expectations

  1. Simplified User Interface

An extremely user-friendly and intuitive interface that minimizes the learning curve, allowing the user to navigate effortlessly.

ii. Guided Assistance

Clear and simple step-by-step instructions that guide the user through the scanning and reporting process without confusion.

iii. Minimal Typing

Limited typing requirements, as user's may find extensive text input challenging; instead, options for quick selections or voice input are preferred, enhancing accessibility.

iv. Visual Cues

Incorporation of visual cues and simple indicators to easily understand the status of machinery and the severity of detected issues.

v. Helpful Support

Access to easily understandable help resources and, if needed, responsive customer support for any questions or issues.

c. Application Structure and Screens

A

Start a Session

  1. Real time instruction tutorial on how to conduct AR session for first time users  

  2. Icon to open instructions tutorial for non-first-time users  

  3. Option for flashlight?  

  4. Timer for session duration  

  5. Pause/Play/Stop button  

  6. Ability to take photos during the session (like in iPhone camera app) ? 

  7. Ability to take notes around a detected object   

  8. Real time checklist notifications and button to view checklist items 

B

Previous Sessions

  1. Scrollable list of previous sessions with Session name and date stamp 

  2. Clicking on session will show details of that session

    1. Ability to access folder containing video recordings from the session 

      1. Save video  

      2. Upload video 

      3. Send videos 

  3. Details may be exported as a report in PDF format

  4. Ability to send report via email and other options or direct to supervisor in admin dashboard 

C

Login Page

  1. Username and Password entry fields 

  2. Forgot Password  

    1. Recover through call  

    2. Recover through email  

    3. Above points depend on company policy

  3. No Signup needed, password will come from company directly  

    1. If company policy wants, then signup page will also be made with fields of email, name, password, retype password 

D

Settings

  1. Logout  

  2. App UI tutorial  

  3. AR Session tutorial  

  4. AR Session settings 

    1. Video record quality  

    2. Information user wants to be saved in session reports and logs  

  5. Customer helpline  

  6. Privacy policy  

  7. Terms and Conditions 

E

Homepage

  1. App UI tutorial  

  2. Buttons for:

    1. Settings

    2. Previous Sessions 

    3. Start a session  

    4. User Profile??  

F

Onboarding Screen

  1. Explain the features of the application. Card with a slider and illustrations.  

d. User Flow

  1. Low Fidelity and Hi Fidelity Designing

Embarking on the design journey, a multitude of ideas for the responsive website were carefully streamlined, focusing on those that promised the most efficiency and a truly user-centric experience, ultimately aiming to deliver the most rewarding user interaction and flow. This process began with the sketching of hand-drawn paper wireframes, which evolved into digital wireframes, and finally blossomed into the high-fidelity design through multiple iterations, each a step closer to the perfect user experience and interface.

a. Paper Wireframes

b. Digital Wireframes

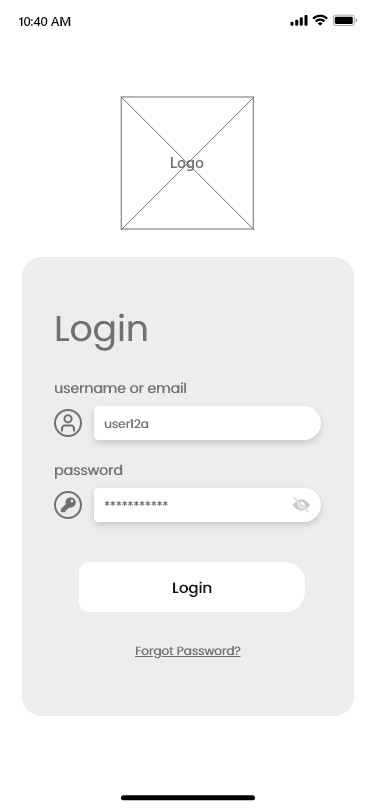
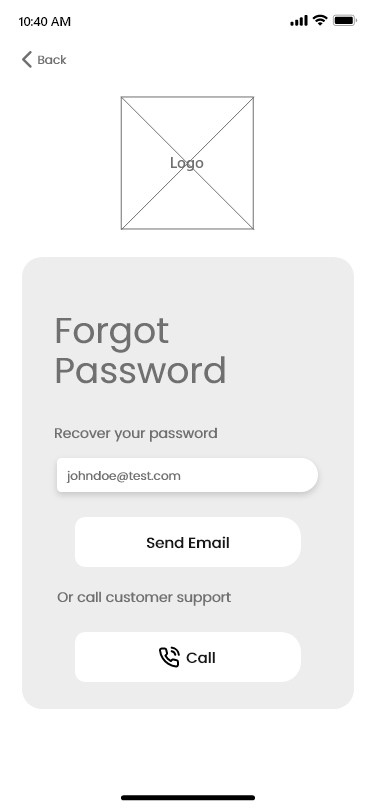
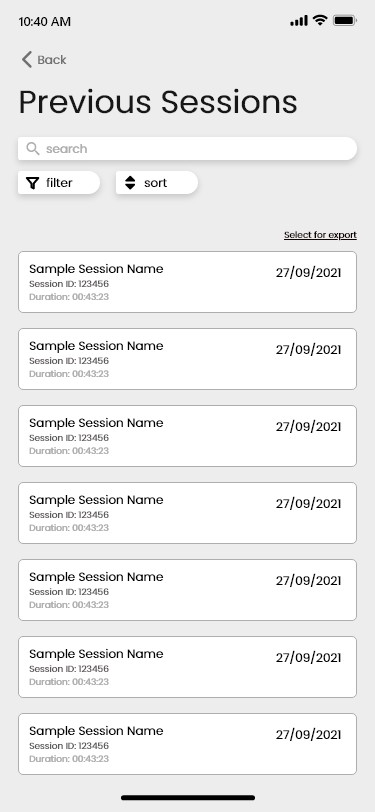
c. High Fidelity Mockups

Using the paper and digital wireframes as a base reference , the new User Interface was crafted using Adobe XD, as per the feedback received. Keeping in mind the targeted user, a design and production decision was made, which prioritized designing for tablet and landscape orientation (mobile) interfaces.

  1. Logo Design

Next up, I carefully designed a sleek and straightforward logo using Adobe Illustrator, which would embody a minimalistic aesthetic to convey simplicity and clarity.

  1. Development Handoff

After completing the prototype design, we transitioned into the development phase using Unity 3D. This transition required me to familiarize myself with Unity 3D and use its codebase to develop the application's front end. It was a learning experience where I not only implemented the design but also expanded my skills to include front-end development. This collaborative effort between design and development in Unity 3D transformed the initial prototype into a functional and interactive application.

  1. UI Kit and Design System

Typography

Poppins Bold
Poppins Medium
Poppins Regular

Aa Bb Cc Dd Ee Ff Gg Hh Ii Jj Kk Ll Mm Nn Oo Pp Qq Rr Ss Tt Uu Vv Ww Xx Yy Zz
0 1 2 3 4 5 6 7 8 9

Primary Colors

#252860

#252860

#D9D9D9

#D9D9D9

Secondary Colors

#252860

#252860

#D9D9D9

#D9D9D9

AR Session Colors

Success
#8EC42A

Success
#8EC42A

Info
#FDCF5D

Info
#FDCF5D


Warning
#EA4B2E

Warning
#EA4B2E

Checklist
#3A75AF

Checklist
#3A75AF

Form Elements

Daniyal Admaney Portfolio

UX and Product Design